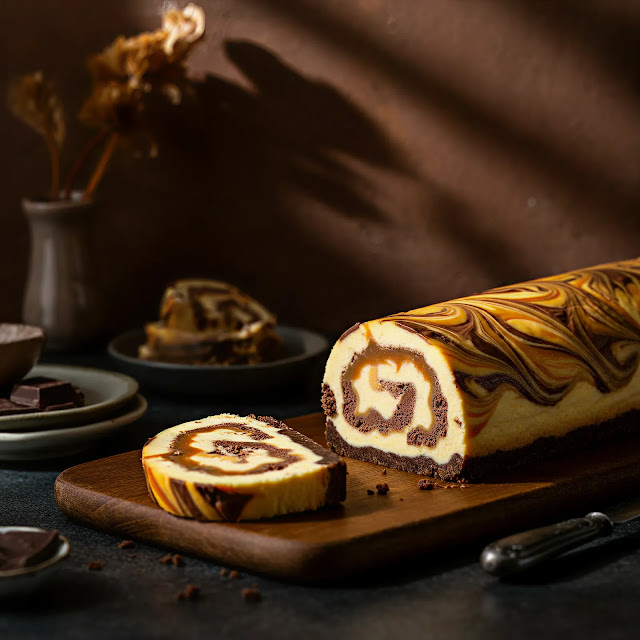
If you're searching for a show-stopping dessert that's as delicious as it is unique, say hello to the cheesecake log!
This dessert combines the creamy, tangy goodness of classic cheesecake with the visual appeal of a rolled presentation, making it perfect for celebrations, family gatherings, or even just a weekend baking project.
This blog will walk you through every step of creating your very own cheesecake log. Plus, we’ll share tips to ensure you get the perfect roll every time!
Why Make a Cheesecake Log?
Cheesecake logs are a fun twist on traditional cheesecake. They make a stunning centerpiece, are easier to portion than classic slices, and allow for endless flavor customization. Whether you’re a seasoned baker or new to the kitchen, a cheesecake log is a creative way to experiment.
Key Benefits of a Cheesecake Log:
- Perfect for Sharing: Its rolled form makes it easy to slice and serve.
- Customizable: Add your favorite flavors, mix-ins, and toppings.
- Visually Striking: The swirl effect adds a professional touch.
Ingredients You'll Need
Here’s everything you’ll need to create the ultimate cheesecake log. Most of these items are pantry staples, making it easy to whip up this dessert any time.
For the Cheesecake Filling:
- 16 oz cream cheese (softened)
- 1 cup granulated sugar
- 2 large eggs
- 2 tsp vanilla extract or vanilla bean paste
- 1 tbsp lemon juice (optional, but recommended for a tangy kick)
- 1/4 cup sour cream
For the Crust Layer:
- 2 cups crushed graham crackers (about 10 full-sized crackers)
- 1/2 cup unsalted butter (melted)
- 2 tbsp granulated sugar
For Decoration:
- Powdered sugar for dusting
- Optional toppings like fresh berries, chocolate ganache, or caramel sauce
Step-by-Step Instructions
1. Prepare Your Pan
Start by lining a 10x15-inch jelly roll pan with parchment paper, ensuring the edges hang slightly over the sides. This will help lift the cheesecake log later. Preheat your oven to 325°F (163°C).
2. Make the Cheesecake Filling
- Using an electric mixer, beat the cream cheese until smooth and creamy.
- Add the sugar and continue mixing until fully combined.
- Mix in the eggs one at a time, scraping down the sides of the bowl as needed.
- Add vanilla extract, lemon juice, and sour cream. Mix just until incorporated.
3. Create the Crust Layer
- Combine the crushed graham crackers, melted butter, and sugar in a bowl. Mix until the crumbs are evenly coated and resemble wet sand.
- Press the graham cracker mixture evenly onto the prepared pan, creating the base layer for your cheesecake log.
4. Pour and Bake
- Pour the cheesecake mixture evenly over the crust layer, using a spatula to smooth it out.
- Bake in the preheated oven for 20–25 minutes or until the center is just set.
5. Cool and Roll
- Allow the cheesecake to cool on a wire rack for 15 minutes before transferring it to the fridge to chill completely (about 2–3 hours).
- Once chilled, carefully lift the cheesecake out of the pan using the parchment paper.
- Roll the cheesecake log tightly from one short edge to the other, using the parchment paper to guide you. Keep it wrapped as you roll to maintain its shape.
6. Chill and Serve
- Transfer the rolled cheesecake to the fridge for at least 1 hour to set. Once firm, unwrap and place it on your serving dish.
- Dust with powdered sugar and add your desired toppings. Slice into rounds and serve!
Tips for the Perfect Cheesecake Log
- Use Room-Temperature Cream Cheese
Achieving a smooth, lump-free texture is easier when your cream cheese is softened. Take it out of the fridge at least 30 minutes before you start baking.
- Avoid Overmixing
Overmixing can incorporate excess air, causing cracks during baking. Mix until just combined for the best results.
- Chill Completely Before Rolling
Warm cheesecake will crumble when you try to roll it. Be patient and ensure the cheesecake is thoroughly chilled before you attempt this step.
- Customize the Flavors
Add cocoa powder to the crust for a chocolatey twist, swirl in fruit purees, or mix in crushed cookies for extra texture. The possibilities are endless!
- Use a Sharp Knife to Slice
For clean, elegant slices, use a very sharp knife and wipe it clean between cuts.
Why You’ll Love Making Cheesecake Logs
Cheesecake logs are impressive without requiring advanced baking skills. They allow creativity while ensuring guaranteed crowd-pleasing results. Plus, they’re a conversation starter at any gathering!
Flavor Ideas to Explore:
- Classic Strawberry Cheesecake Log: Add strawberry jam before rolling.
- Chocolate Espresso Cheesecake Log: Add instant espresso powder and drizzle with chocolate ganache.
- Tropical Cheesecake Log: Swirl in passionfruit pulp and top with toasted coconut.
Take Your Baking to the Next Level
Whether you’re hosting dinner parties or just craving something sweet on a Saturday, the cheesecake log is an easy way to impress with minimal effort. It’s a dessert that combines classic flavors with a modern twist!
Eager to try this recipe? Share your cheesecake log photos with us on social media and tag us ! We can’t wait to see your creations.
Happy baking,


إرسال تعليق